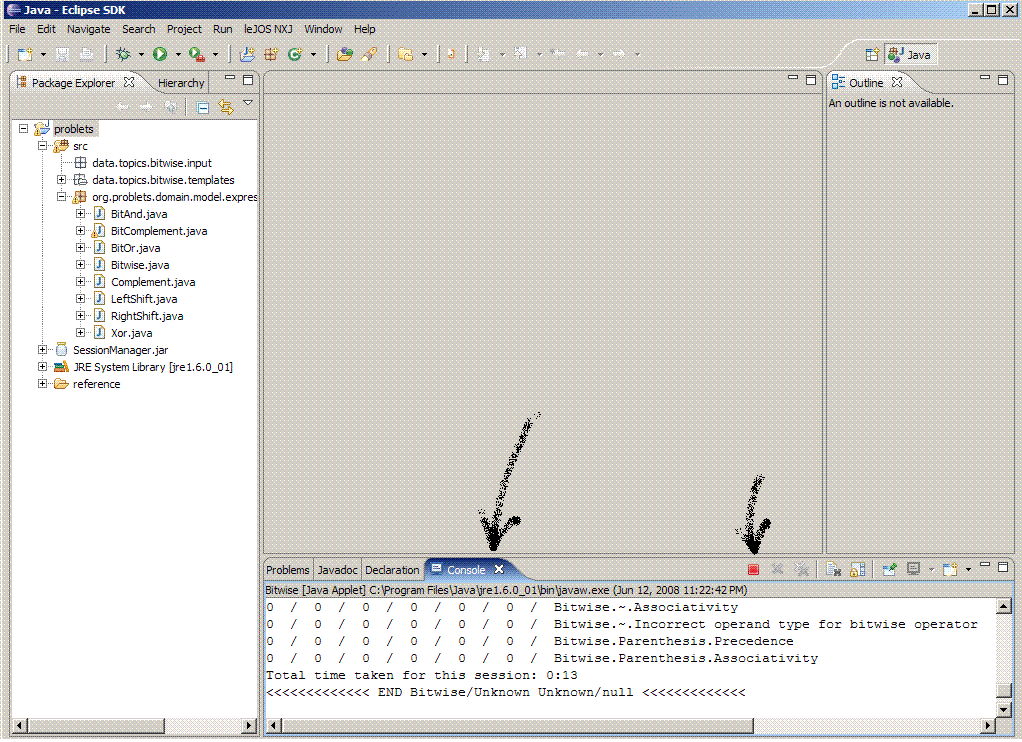
The following figures demonstrate how you can run Problets project
in Eclipse. These figures were created from scratch: fresh Eclipse workspace,
fresh project.
-
Launch Eclipse, designate "dev" as the name of your workspace.
Eclipse will create the directory called "dev" for you.
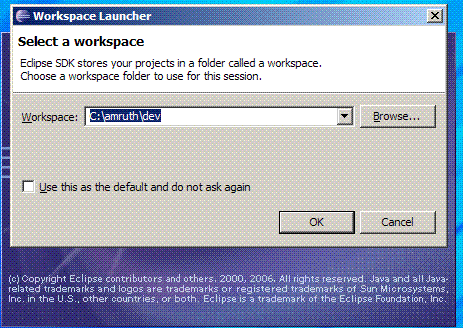
- Exit Eclipse.
Copy "problets" directory (that you were provided) into the "dev" directory
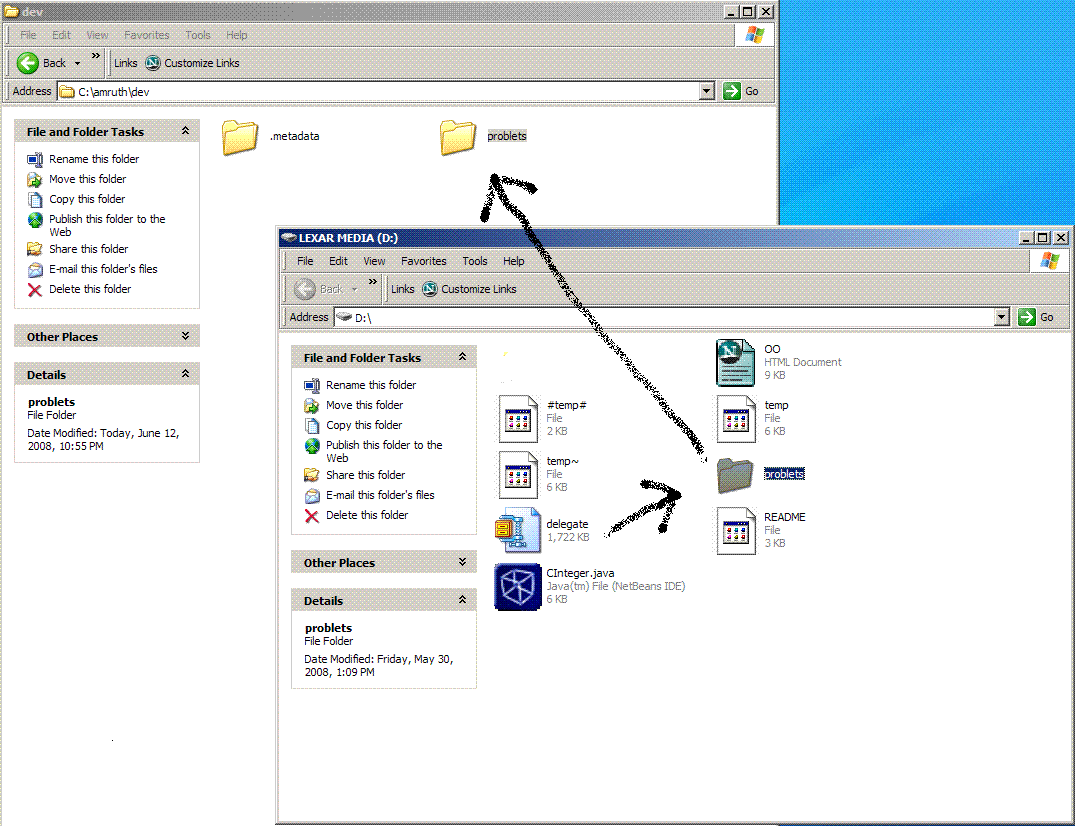
-
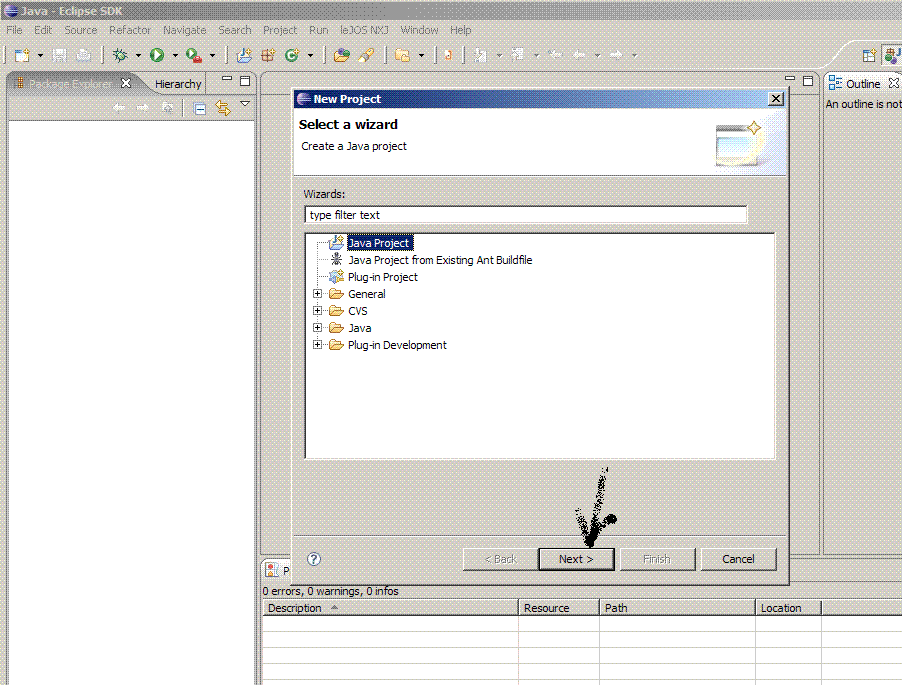
Re-launch Eclipse. Create a new project
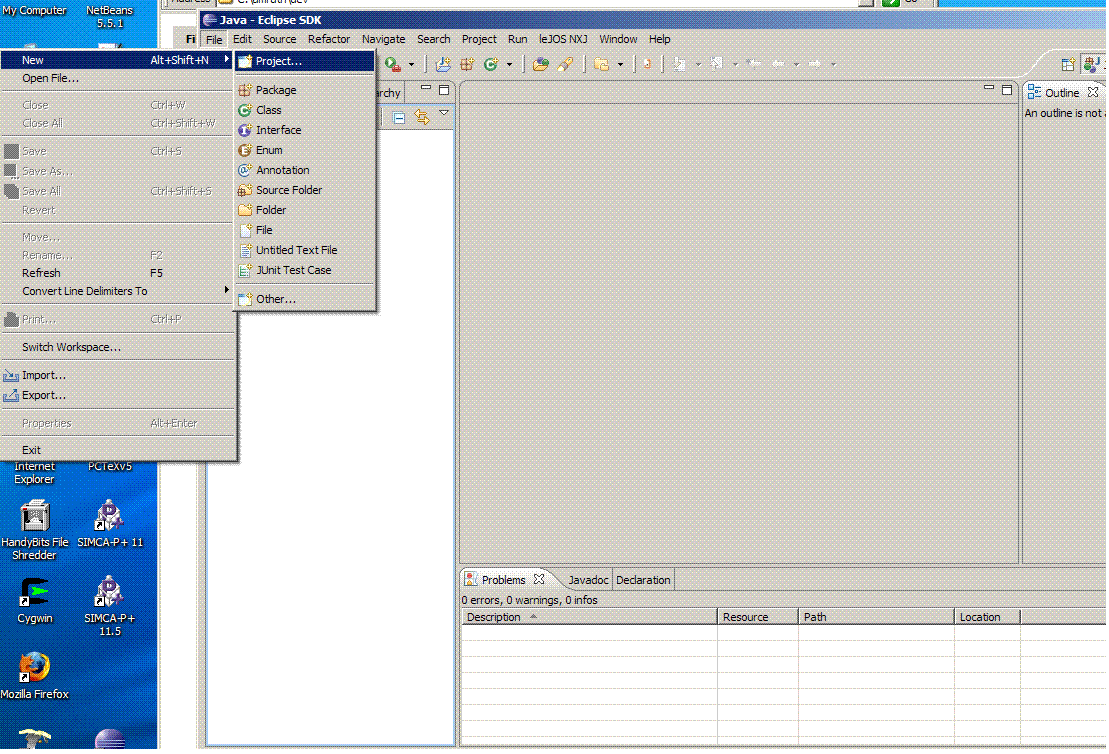
-
Select Java project, click Next button
-
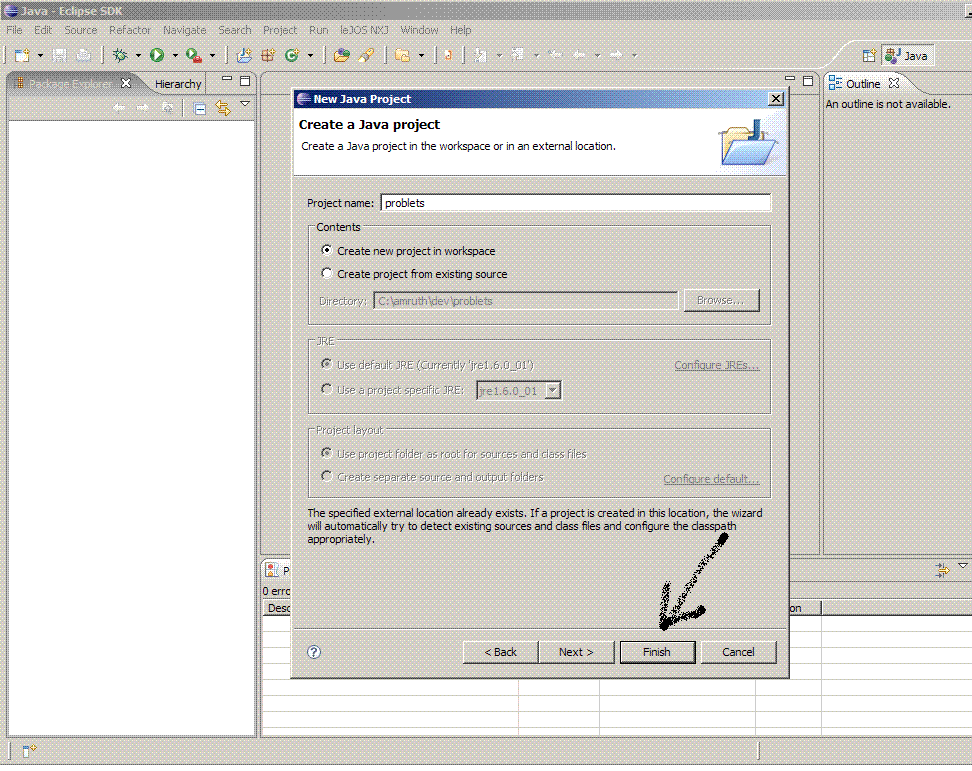
Name the project "problets" - this is the same as the name of
the folder that you copied into the "dev" workspace directory above.
Select "Create new project in workspace". Click Finish.
-
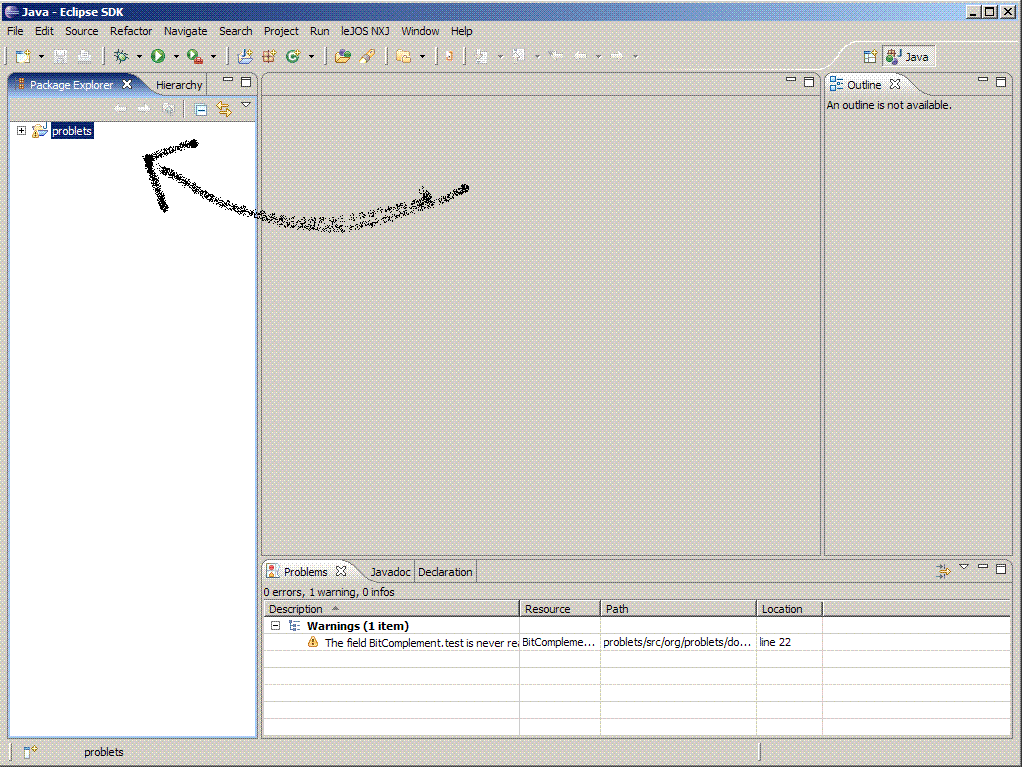
Problets project will now appear in the left in "Package Explorer" window.
-
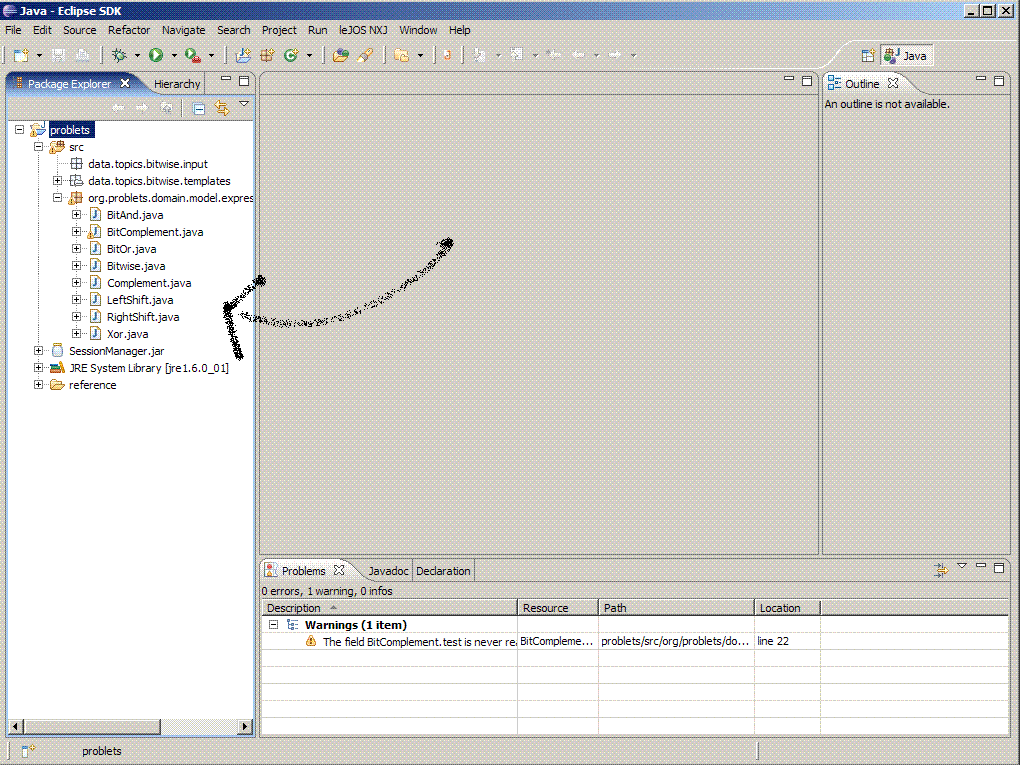
You can click and expand the nodes under Problets project.
-
Select Run Menu/Run option.
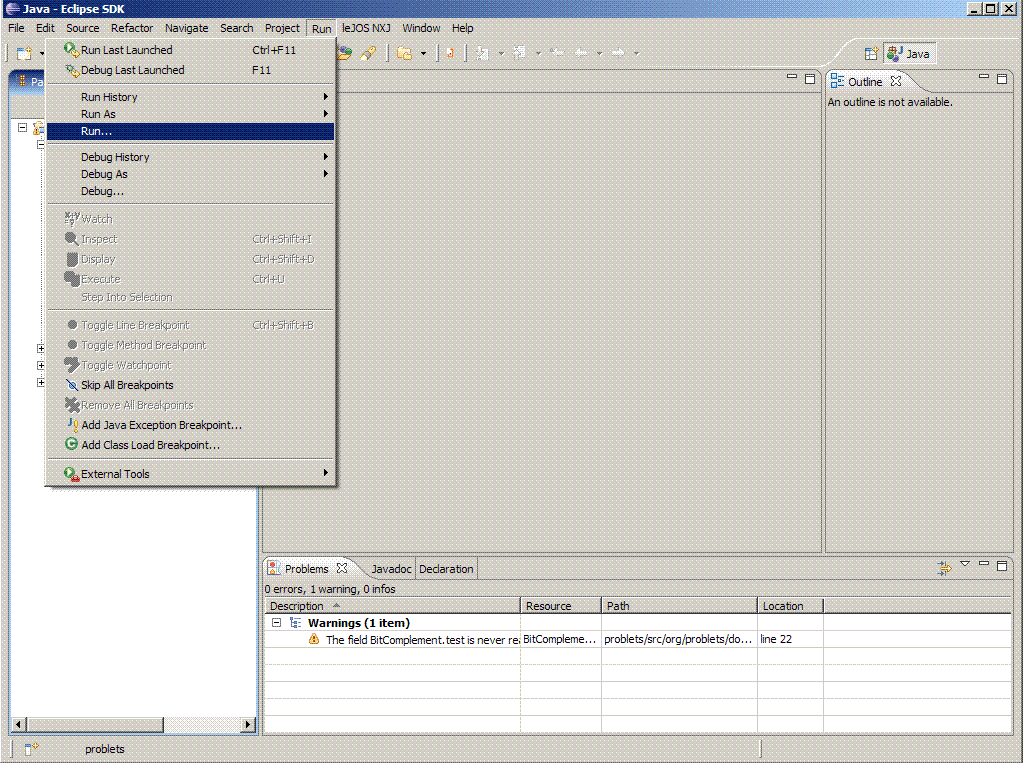
-
Click "Java Applet", press the "New" button above it to create a new run configuration.
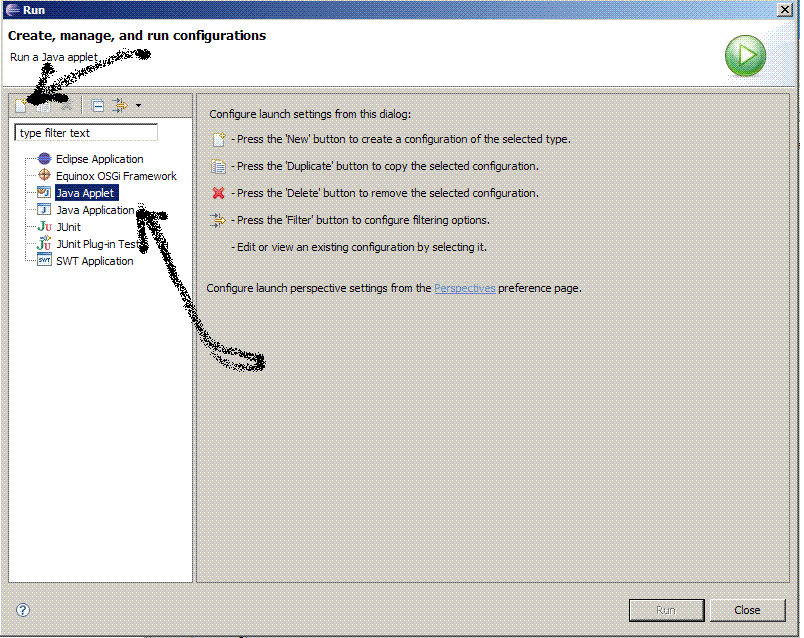
-
Give the configuration the name "Bitwise."
For Project, enter "problets."
For Applet, enter "org.problets.services.SessionManager"
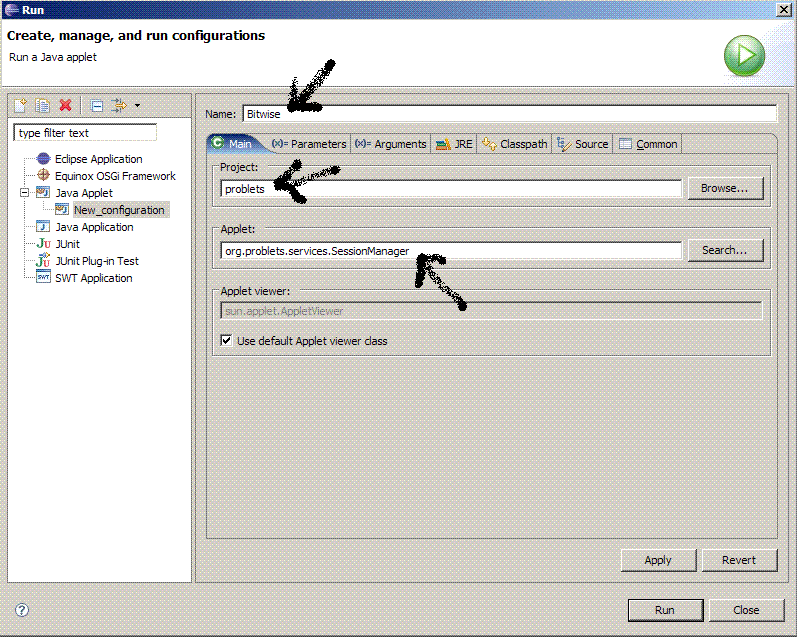
-
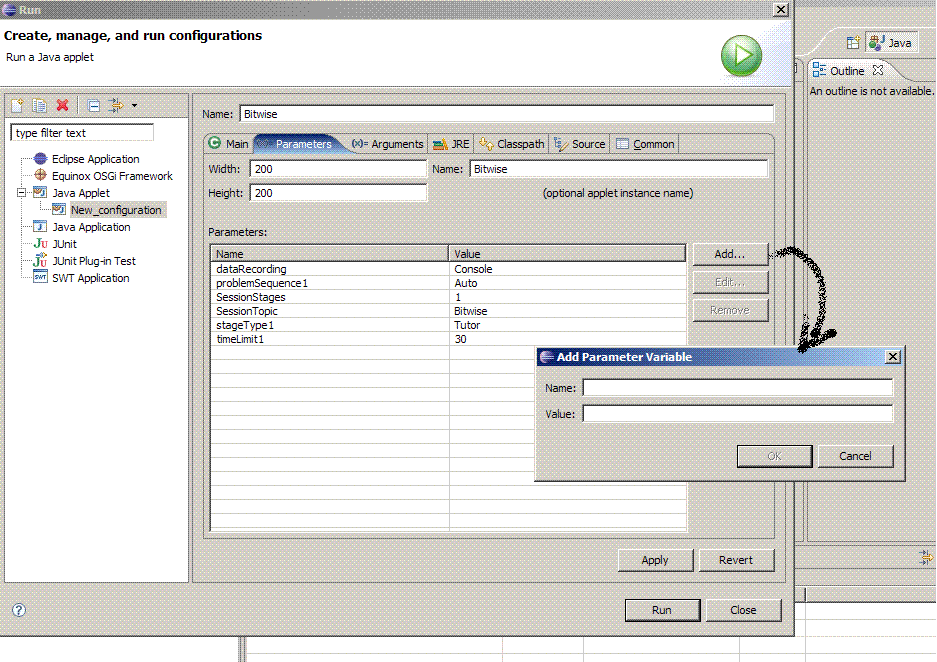
Select the Parameters tab on top.
Add parameters and values as shown in "Eclipse run settings". After entering all the
parameters, click Apply and Run.
In addition, add the attribute stageTitle1 with the value Practice.
- A separate problet window will be launched. On Eclipse, a "Console" window
will appear. The red button stops the applet.
